|
In this section, you will create a layout for the stacked pages, then review the data and preview your site.
Continuing from the previous section, you should see your data list on the Employees page.
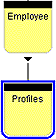
1. Switch to Site view.Here you can see that NetObjects Fusion has created stacked pages as a child of the Employees page as described in Elements of Data Publishing: Stacked Pages.
2. Select Untitled Stacked Page on the stacked page icon and type Profiles.
You can also name or rename stacked pages in the Page tab of the Properties palette.
3. Double-click the Profiles stacked pages icon.
The first stacked page appears. It is blank. Also, the stacked page navigation bar appears below the control bar.

The navigation bar indicates you are looking at page 1 of 5 because NetObjects Fusion has already created a stacked page for each record in your Excel spreadsheet. All the stacked pages are blank until you create a layout.
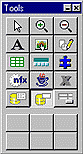
4. Select the Data Field tool on the Tools palette.
5. Draw a rectangle to place a data field on the page.
NetObjects Fusion displays the Data Field dialog box.
6. Click the drop-down list to view available fields.
The fields appear in the sequence you entered them in the spreadsheet.
7. Choose Last Name and click OK.
The last name appears in the data field. Later, to change the data displayed by this data field, use the drop-down list on the Data Field tab on the Properties palette. Click Show Element Borders on the View tab of the Properties palette. NetObjects Fusion outlines the data field in red. This indicates the field is a data object. NetObjects Fusion outlines non-data objects in black.
8. Repeat steps 4 - 7 to place additional data fields.
9. Place a text block on the right side of the page and type: NEXT.
Now make this text into a link your site visitor can use to navigate the stacked pages.
10. Select NEXT and then click Link on the Text tab on the Properties palette.
11. Choose the Smart Link tab, select Next Stacked Page, and click Link
Clicking NEXT will take your site visitor to the next stacked page. Clicking NEXT in the last stacked page takes your site visitor to the first stacked page.
This is a very simple layout. For a publication-quality site, you can add enhancements, such as text blocks to label your data fields. You can also use buttons for the Next, Up, and Previous links. See the NetObjects Fusion 2.0\Parts\Design Parts\Buttons folder for a selection of buttons. Add a logo and graphic enhancements to give your pages a professional
appearance.
12. Click the -> and <- buttons on the stacked page navigation bar to view other pages in the stack.
Note any layout change you make on a page will be repeated on all other stacked pages.
13. Click Preview to view your site in a browser. Check all the links in the data list and stacked pages.
|
