You can create HTML frames in any part of the MasterBorder without coding HTML by using AutoFrames. But if you want to put frames in the body of your page, you can script them, just as with any HTML editor.
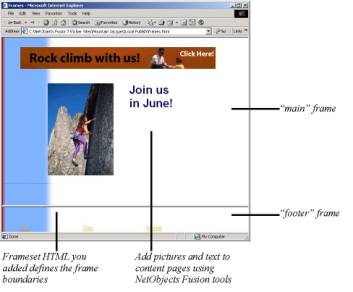
Here’s an example of accessing HTML to create a section of a site that uses two horizontal frames–one body frame that scrolls, and a footer frame that doesn’t. Navigation buttons in the footer open each of two pages in the body, while a Home Page button links out of the frames section to the site’s Home page.
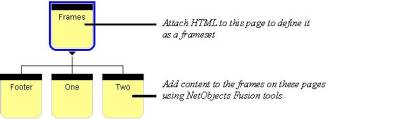
In Site view, create a new page for the frameset—the page where your frames begin. Name the page Frames.
Beneath this page, create three content pages for the frames to display, named Footer, One, and Two.
Display the Frames page in Page view, and add HTML that defines it as a frameset, setting the size and position of each frame, and the content it initially displays.
Select the Layout, click the HTML button on the Layout Properties palette, and type the following in the Between Head Tags area of the Page HTML dialog:
<frameset rows=”*,70”>
<frame name=”main” src=”./html/one.html”>
<frame name=”footer” src=”./html/footer.html”>
</frameset>
Or, if you’re publishing the site using the Flat directory structure rather than the by Asset Type structure, type the following for the second and third lines:
<frame name=”main” src=”./one.html”>
<frame name=”footer” src=”./footer.html”>
This HTML creates two horizontal frames—one called “main” that occupies the bulk of the page, and a 70-pixel-high frame called “footer” at the foot of the page.
Click OK in the dialog when you’re done.
Note:
The src attribute is a relative path name to a content page that must
match exactly the path name generated when you publish the page. The path
depends on the directory structure selected in Publish view (from the
Publish menu, choose Arrange Files, and then choose one of the submenu
options). The file name is the page’s name in Site view, all lowercase,
with an .html extension and an underscore in place of spaces and other
special characters. So One in Site view becomes one.html in the resulting
HTML. If you’re not sure where a content file is relative to your frameset
page, or what its HTML name is, look in Publish view.
Open the Footer page in Page view.
Click in the MasterBorder and select ZeroMargins in the Name field on the MasterBorder Properties palette.
Click in the Layout area and enter 110 in the Height field on the Layout Properties palette.
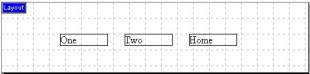
Add three text boxes to the Layout, containing the text One, Two, and Home.
Select the text One, click Link, select the Internal Link type, and select the One page. In the Target section of the Link dialog, click New and type main in the text field next to the New button. Click Link to close the dialog.
Select the text Two and create an internal link to the Two page. In the Target section of the Link dialog, click Existing and select main from the drop-down list. Click Link to close the dialog.
Select the text Home and create an internal link to the Home page. In the Target section of the Link dialog, click Existing and select _top from the drop-down list. Click Link to close the dialog.
Open the One and Two pages in Page view, choose the ZeroMargins MasterBorder on the MasterBorder Properties palette, and add whatever content you want to appear in the main frame for each page. Add content to the Home page.
You can’t preview to see scripted frames, so publish the site and test
your frames. Click each button in the bottom frame. The One button should
display the contents of the One page in the top frame, the Two button
should display the Two page in the top frame, and the Home button should
exit the frames altogether and display the Home page in the whole browser
window.